Post on the Lathe
This is the second version of the process using a drop dial indicator to locate the carriage vs the hand wheel graduated dial and calipers.

Drawing with notes taped to the wall over the lathe.
The cutting edge of the three tools used do not locate in quite the same place so the hand notes record the dial indicator reading to locate each tool in the same place on the material.
The parting tool is used as the reference. The parting blade is 0.058" wide, so that must be added to get the desired sized part.
The high-speed steel (HSS) is used to knock off the "corners" of the hex material so the carbide blade will not fracture.
The carbide cutter, which should stay sharp longer, is used as much as possible

To start the squared end of the 3/8" hex stainless-steel bar is located as close to the chuck as possible to increase rigidity. (Hard to see in the top-left by the tool post handle.) To avoid repetitive math the dial drop indicator (lower-right) is located to read zero so the readings in the notes above can be set without as much though -- and potential error.
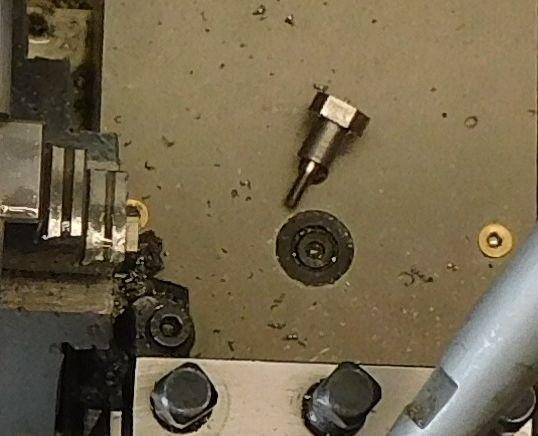
When the finished post is cut/parted off, this is where things will be, ready to start work on the next post.
The end of the parting tool can (almost) be seen against the stock. Near the middle of the photo is the big black holder for the HSS blade used for the interrupted cuts to remove the corners of the hex stock. The carbide tool points down in the photo. The small carbide blade is brazed onto a steel holder (blue)
The tool post (with all the black bolts) is rotated and then locked in place to use each tool.

The carriage (and the parting blade) are shown moved to the right 0.796", the length of the post plus the width of the blade. This distance can be seen on the drop indicator.
The chuck is loosened, hex stock moved out against the cut-off blade and the chuck tightened to hold the material.
 From what I read, the "interrupted cut" caused by the hex stock would be too much of a shock for a carbide cutting tool and may shatter the tip. So started turning with a HSS tool to get down to round.
Switching to a carbide tool to get the shaft down to the required 0.247" diameter for where the arm will fit. Stainless Steel is hard and I need 60 of these posts. Carbide tools are harder and should stay sharp longer than the HSS cutter.

Next material is removed getting ready to thread the mounting stud. The dial indicator is used to make sure the larger shaft is 0.301" long so the arm can move freely on the shaft. The smaller section is reduced to 0.112" to accept #4-40 threads.


I used the tailstock quill to keep the die square and apply light pressure. The die is held in place by the tool post and the chuck/part turned by hand.

With the threads cut, I used the cut-off tool to clean up the shoulders and remove material from the un-threaded shaft so the post will tread flat against the bracket.


Ready to cutoff the post, the dial indicator is used to return the parting tool to "zero" ready to part off the post..

 The parting process is messy. With the end and both sides of the blade touching metal, lots of cutting oil is used to carry away heat and the chips. With the post "parted off", a file to remove the little nub on the top, wet/dry emery cloth to ease the top edges and we're done.

At this point things are in the same place as in the beginning, ready to move material out to start the next process.
Rinse and repeat as needed.
